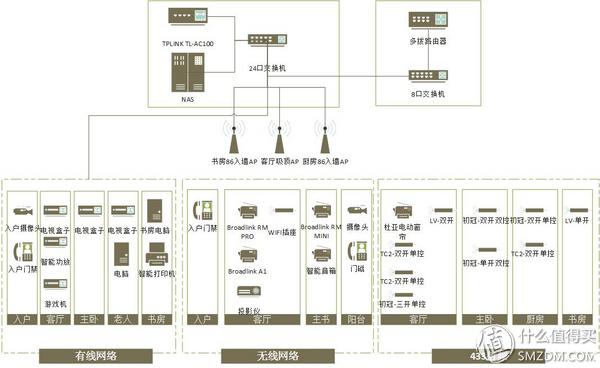
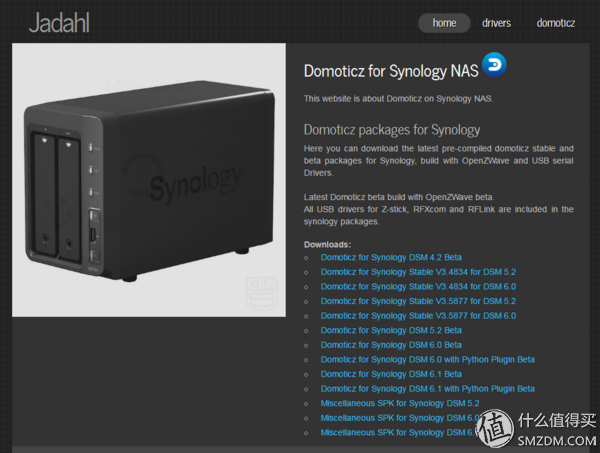
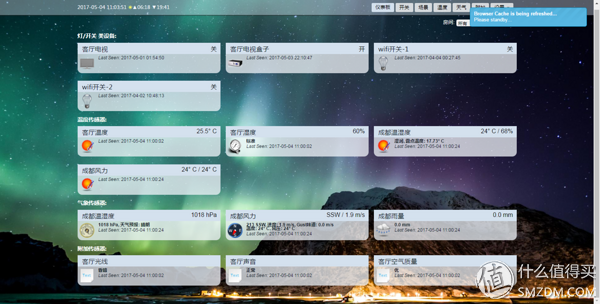
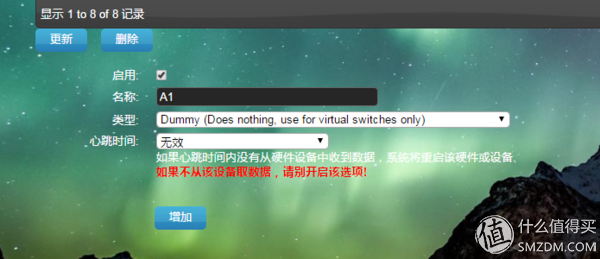
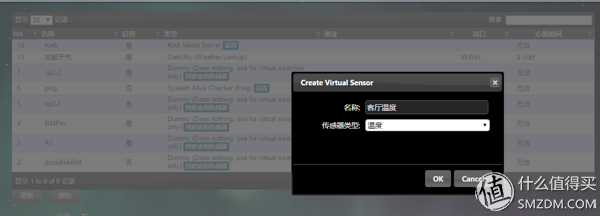
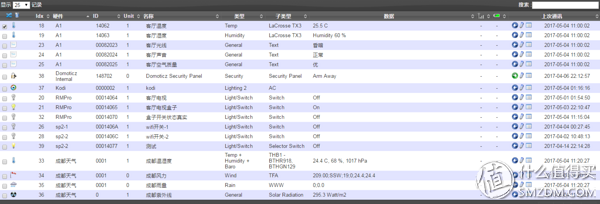
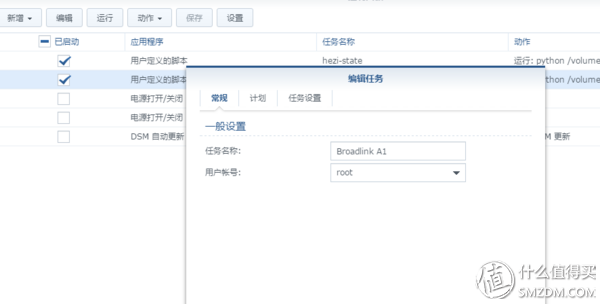
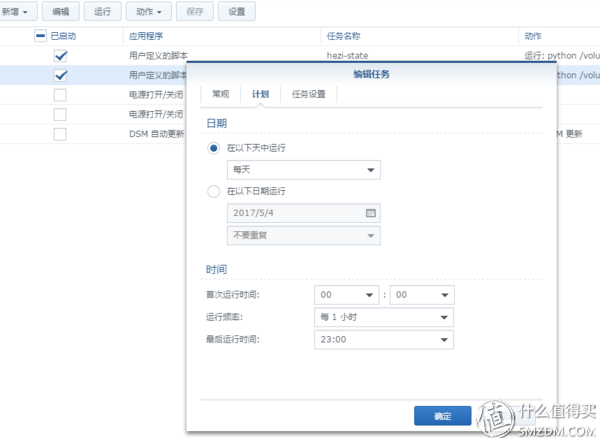
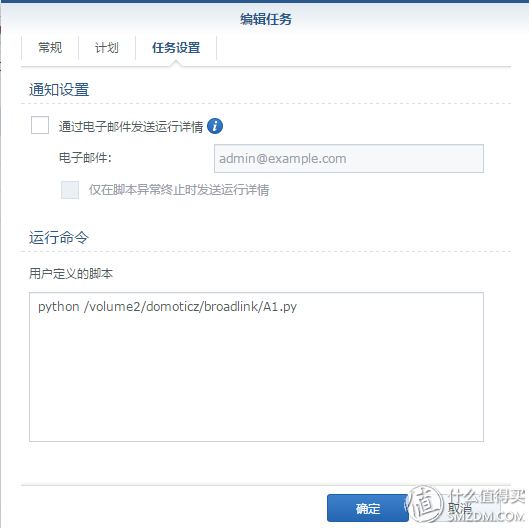
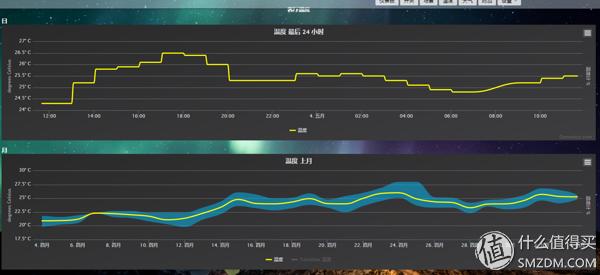
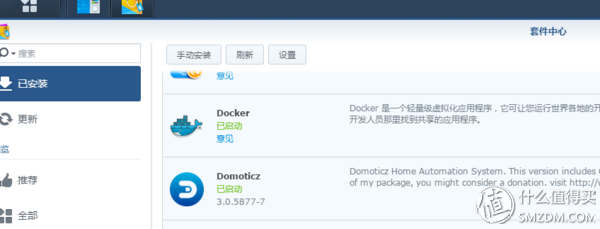
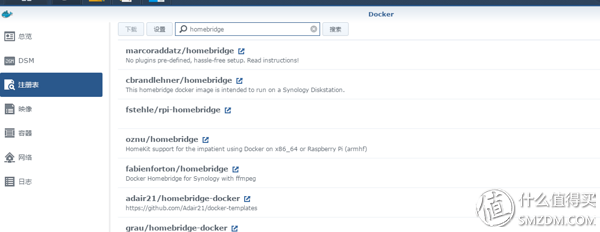
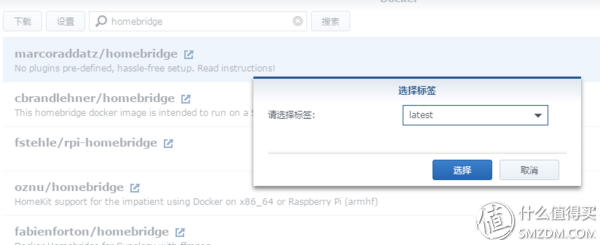
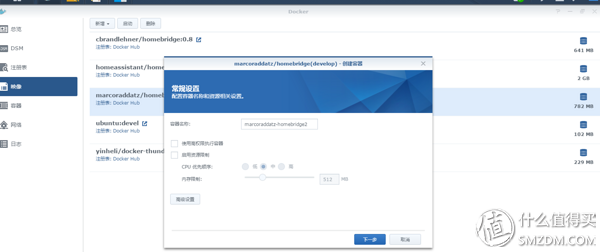
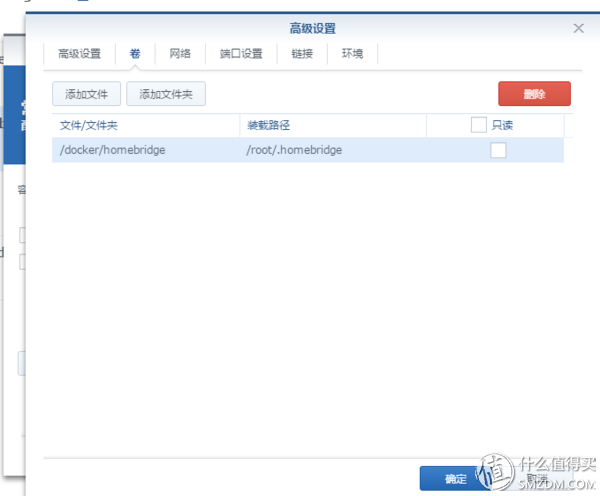
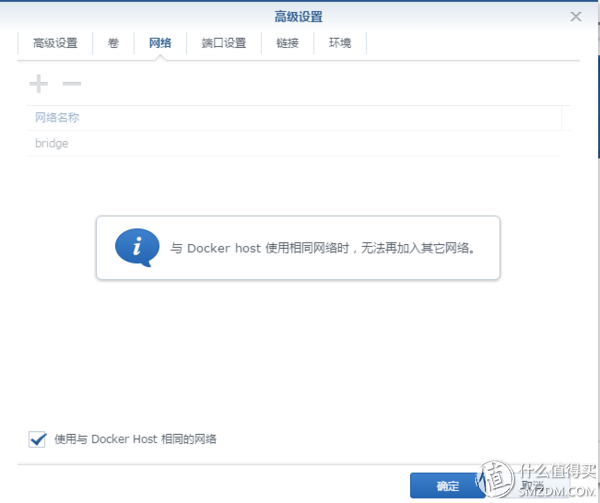
OFweek smart home network news recently this site more than a lot of smart home posts, my home decoration has been six months, the original preparation is to want to write a series after the completion of all, but found that a lot of things are written by the big people almost, so I Immediately write down, first defrauding gold coins, warmly welcome Tucao. What are the benefits of smart home? Of course, it is idle egg pain, no money, but also want to install 13, so only the following things, first put a network structure diagram of my new home. Previously, the programs introduced by the big men were basically domoticz (control center) + homebridge (voice control) + third-party gateway (to control the millet or Broadcom equipment), or domoticz changed to Home Assitant. I am also this routine, but what I want to introduce below is a method of lowering the threshold - NAS All in one, with a NAS to get all - in fact, do not use the Raspberry Pi. First, prepare in advance: 1, a group of Hui (black skirt can also be), version requirements: DSM 6.0 or more (taken by the big men should be seen, the focus is Docker). 2, Xiaomi or Bolian's smart home suite - I use Bolian, because RM PRO supports RF, from the above figure I can see, my home has a lot of 433 RF switches. 3, the network can be networked, it is best to SS (over the wall), behind the need to download the image. Now that this dog is ready, let's see if we need to complete a smart home in a few steps: Second, officially started: The first step: the establishment of domoticz platform Visit the website to download domoticz's Qunhui Kit, suggest that you download a stable version, such as STABLEV3.5877, it is best not to use the BETA version. Click to display a list, select your group Hui Hui model, for example, my black group is DS3612XS, choose to download, pay attention to download file suffix. Spk. The file is small, only 15.8M. Download is complete, enter the installation. In Synology's "Package Center", click "Manual Installation" and follow the wizard. The installation is completed step by step. In this way domoticz is installed, you can use it directly, is it super simple? Enter http://your nas IP:8084/ in the browser to enter the system, configure the language, skin, and add various devices. The following figure is my domoticz, because the old house is still here, the new home's equipment has not been added, there are not many things. Step Two: Add Smart Devices In fact, domoticz already supports a lot of smart devices, but most of these devices are foreign, but millet, Brilliance is cheap, ah, I also like nuts, so now domoticz has integrated or plug-in, please move to the official wiki Look at the official installation tutorial, I will not copy and paste, here to tell you how to add Bolian A1 sensor (in fact, it seems that no one wrote this) Note: Please refer to the other value posts to install python-broadlink, do not talk about this installation. 1. Add a virtual hardware. "Settings" - "Hardware", configured as follows: Name: Casually, I started A1 Type: Dummy Heartbeat time: invalid - Most virtual devices are set up like this. 2. Add virtual sensors. In order to facilitate the setting of linkage conditions in the future, all of the five I have set are temperature, humidity, light, sound, and air quality. Here I only sample the most common temperatures. We click on "create virtual sensor" on the virtual hardware interface we just created. The configuration is as follows: Name: Casually, I started the living room temperature Sensor Type: Temperature Then we go to the "hardware" - "device" inside you can see the establishment of a good sensor, and remember the IDX serial number of the new sensor, for example, mine is 18, then we need to monitor the temperature of the Bolian A1 The data is transmitted to domoticz. 3. Transmit sensor data to domoticz. In this reminder need to first install python-broadlink, - can also be installed directly in the NAS. After the installation, we only need a python script to execute it. It will not be unrelated, because there will be many selfless dedication and I will also show you the A1 script I did. You just need to change the red spot to your actual IP address. The script does not introduce much, upload this script to the installation directory of Synology python-broadlink on it. Script download address see the end of the text Now we need to execute this script periodically. This is relatively simple in NAS, we do not need to think of the Raspberry Pi to use Linux cron commands, just go to the NAS control panel, use the "task planning" function, add a "planned task", please click Configuration, General, Schedule, Task Settings. The task is set in the run command column, fill in "python/volume2/domoticz/broadlink/A1.py", followed by the uploaded script file in the NAS path. It is not very simple to finish the work, so that we can send the temperature data to domoticz regularly, and provide conditions for various linkages in the future. Give everyone a look at the temperature changes in my home. Step 3: Use homebridge voice control I guess a lot of people are coming to this stuff. In fact, the recognition rate is not very good, but with 13 things, I still have to get one. Here I skip the steps to add a room area in domoticz, we can look at the previous friends, I only talk about how to install in the NAS. 1. Precondition: Install docker. This is not much to say, more than 6.0 support Fahui, direct suite center installation. 2. Download image: Open "Docker" in the main menu, click "Registry" in the left menu, and then search for "homebridge" in the search bar on the right side. You will quickly find a lot. We will download the first one, double-click it, and the version will pop up. Dialog, it is recommended to select the latest version. Then it is waiting... The foregoing description suggests that it is best to jump over the wall because these sources are all abroad and no SS may not be downloaded. 3. Create a container: After the file is downloaded, in the "Image" column, double-click the downloaded file and the "Create container" wizard appears. Click "Advanced Settings", the main set "volume", "network" these two, please set according to the following figure. The /docker/homebridge folder is the folder /root/ that you need to create in your NAS. Homebridge is the configuration directory inside the homebridge image we downloaded. The function of setting this volume is to establish the mapping relationship between the NAS folder and the mirror folder, so that we can establish the homebridge configuration file outside. Network, directly check "Use the same network as DockerHost" 4. Upload the Homebridge configuration file. Upload the modified install. Sh and config. Json to Synology's /docker/homebridge directory, start this new container. Oh, get it. In addition, we may see the script including the previous A1, my domoticz address is 127.0.0.1, which is the benefit of Nas ALL IN ONE, data packets and network cards are not out, theoretically faster response Oh . Follow-up on the phone will not add. At this point, 3 steps to get a smart home - of course, far more than 3 steps, personally feel that the Raspberry Pi is omitted, do not need everyone to build the server, through the existing suite of Steve and Docker mirror, most of the graphics The implementation of the operation. At present, I basically finish all kinds of switches, curtains, TVs, and boxes in my new home. The next step is to get power amplifiers and KODI, and whether I can engage in RS485, realize central air-conditioning, floor heating, and fresh air. Of course, I also hope that Dana can get Ali. , Jingdong's gateway, - I still have many things like Ali and JD. Germany Type Electronics Connection
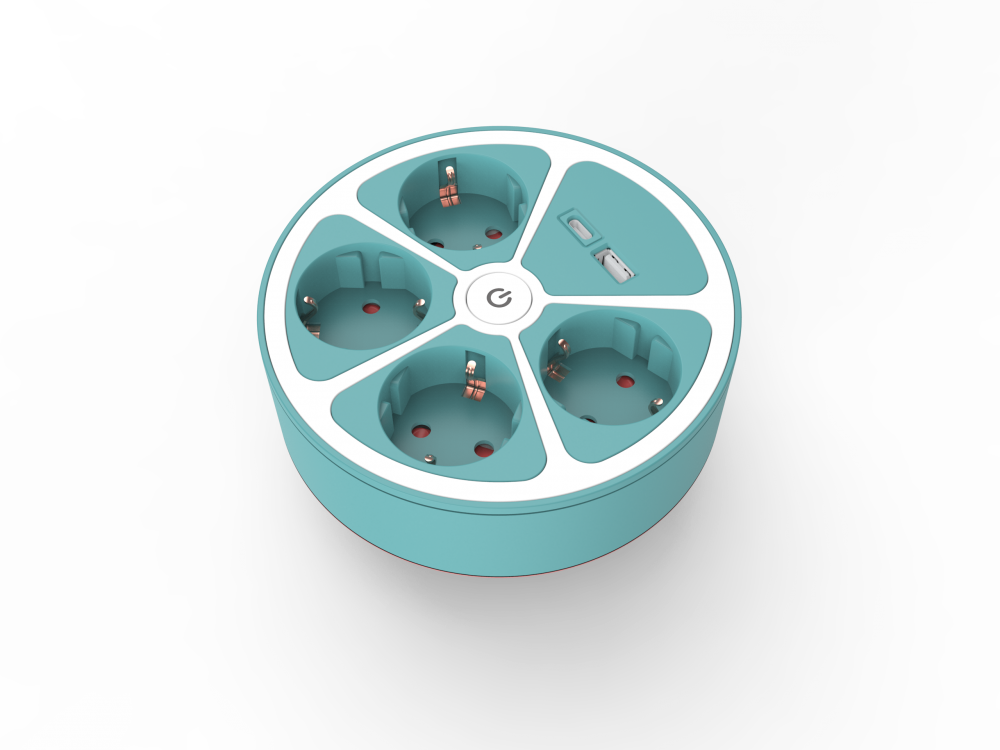
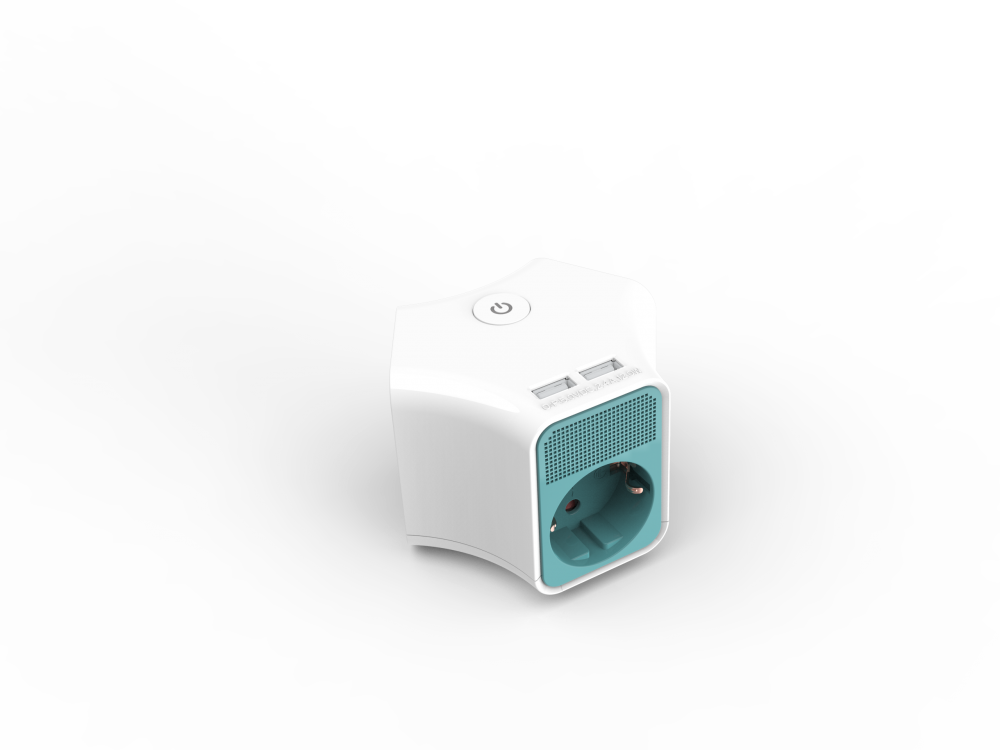
Germany power strips distrbute power to multi devices, computer, refrigerator, etc at same time. The dural plastic housing(flame retadent PP merterial) stands 750 degree high temperature, children safety shutter, premium safety for you and your family. Right-angle plug type E can be flexibility used for suers and save space at same time. The KYFEN Germany USB power strips with USB type A or type C, deliver power to moblie phone, game machine or other mobile machine. KYFEN Germany extension cord socket got CE/GS/RoHS/REACH approved, comply with eu sales requirements.
Germany Type Electionics Connection,Power Strips,Power Extension,Power Distribution Unit CIXI KYFEN ELECTRONICS CO.,LTD, , https://www.kyfengroup.com